Creating new ServiceM8 forms can be a time consuming process, especially when your forever switching between tabs in word looking for that elusive setting. In this guide I will show you step by step how to customize your word ribbon with all your most used functions.

Step 1 – Right click on your tool bar to bring up the “Customize the Ribbon” option.
Step 2 – Create a new tab by selecting the “new tab” button. You can then rename the tab by selecting “Rename”. Within this new tab you can add groups which will allow you to organise your tool bar.
Step 3 – The best place to start adding functions to your tool bar is by selecting the “Main Tabs” from the drop down on left. I would recommend having a look through the “Tool Tabs” and “All Commands” as well.
Step 4 – Select a function you want to add by clicking on it and pressing the “Add” button.  Go through each of the tabs from the “Main Tabs” adding the functions you most use.  Add new groups to your new ServiceM8 tab as you go, this will help you organize your word ribbon.
Part 5 – Once you have added all the functions and sorted them into groups press “ok”.
Step 6 – Your new ServiceM8 tab will appear along the top, at this point you can go back into the ribbon customisation and move the groups around or change the position of a function within a group to change how your ServiceM8 tab is laid out.

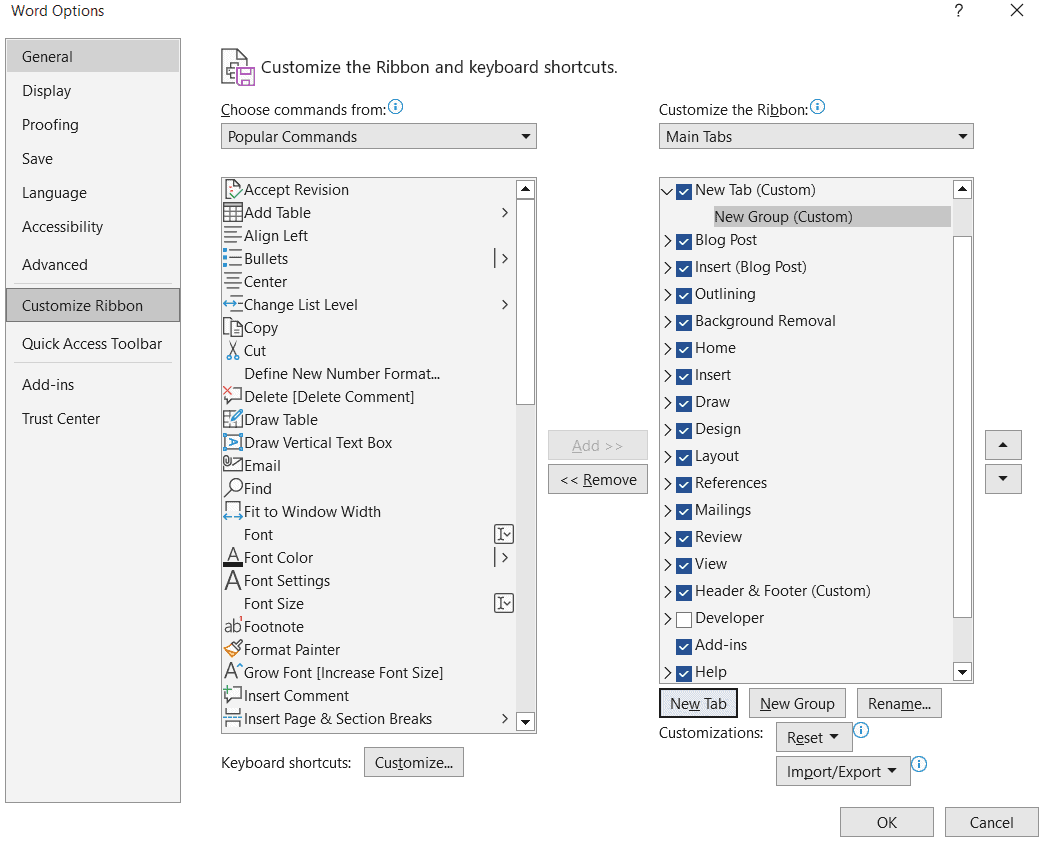
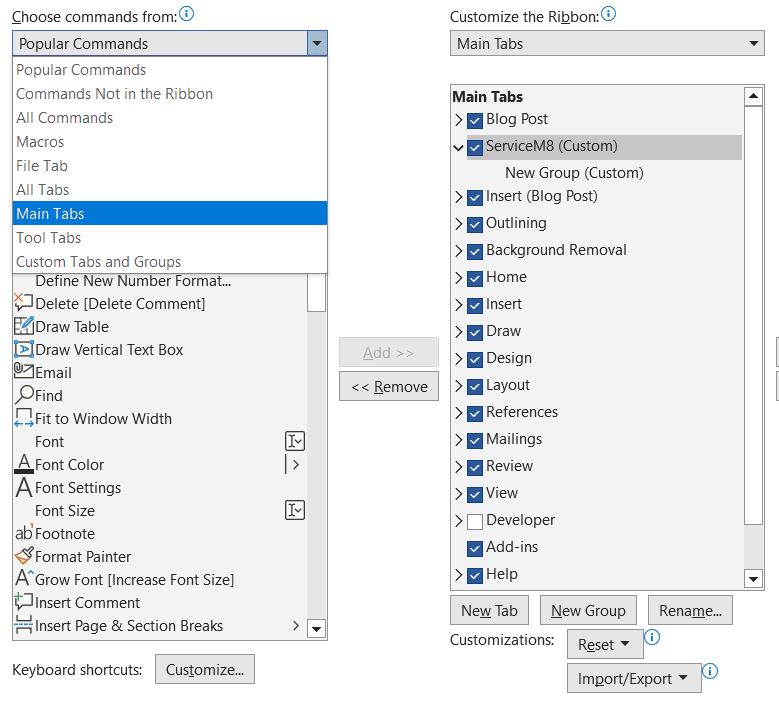
With all your most used functions in one place you will no longer have to search between tabs, saving you time and improving your user experience!

Want to know more about Microsoft Word? Check out their knowledge base here – https://support.microsoft.com/en-us/word

Want to know more about ServiceM8? 

Sign up for your 14 day free trial here

Find out more about creating ServiceM8 forms here with a video I created especially for the ServiceM8 team – https://www.youtube.com/watch?v=H877pYsZRCM